How does it work?
Let us assume that you have a contact us form on a website, such that whenever a contact form is submitted that should create a Opportunity and link Contact in the CRM.
Please follow the steps given below:
- Login as an Admin user.
- Go to Main menu > CRM settings > Automation > Web-form.
-
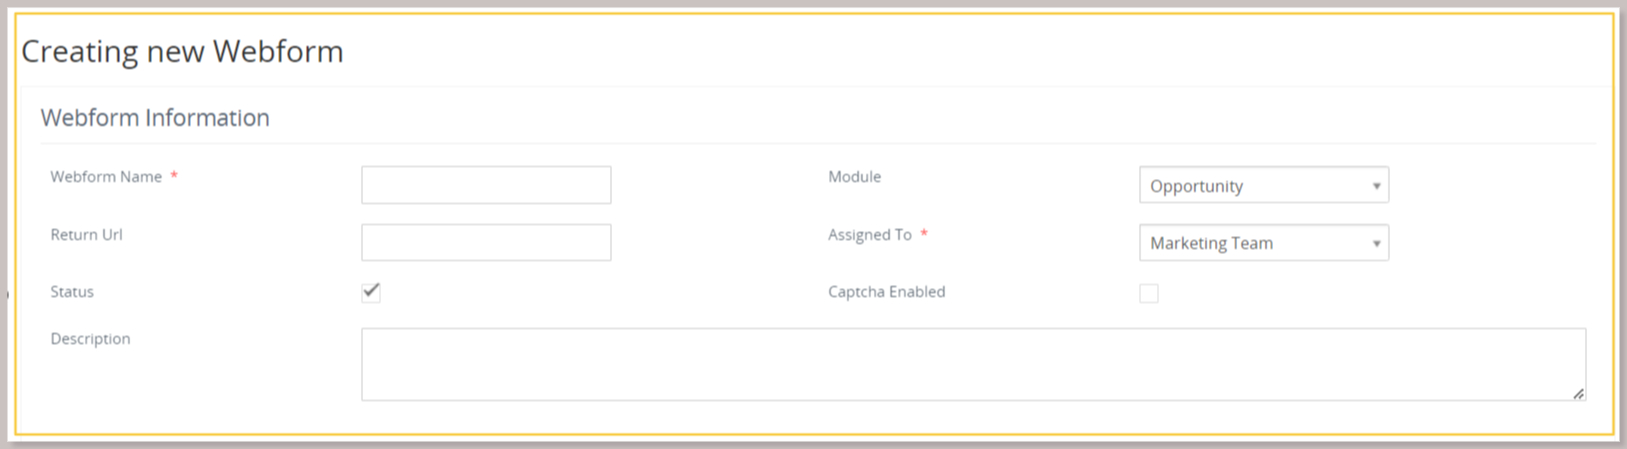
Click on add a new webform button.

- Provide a Name under the " Webform Name Field ".
- Select the module in which the submitted form data should be captured.
- Under the " Return URL Field " provide the link where the CRM should redirect after successful form submission.
- " Status " indicates that the webform is active or not. In case you want to deactivate a webform you can uncheck the status field.
- Optionally you can enable Captcha by checking the " Captcha Unable Field "
-
Record assignment automation:
-
Single user assignment, if you want that record created after the form submission should always be assigned to a particular user, select the users under assigned to field.
-
Single user assignment, if you want that record created after the form submission should always be assigned to a particular user, select the users under assigned to field.
- Round robin assignment, if you like the record to be assigned in the Round Robin fashion select the users under " Round Robin User List " and check the assigned user in " Round Robin Field".

Configuring the Fields
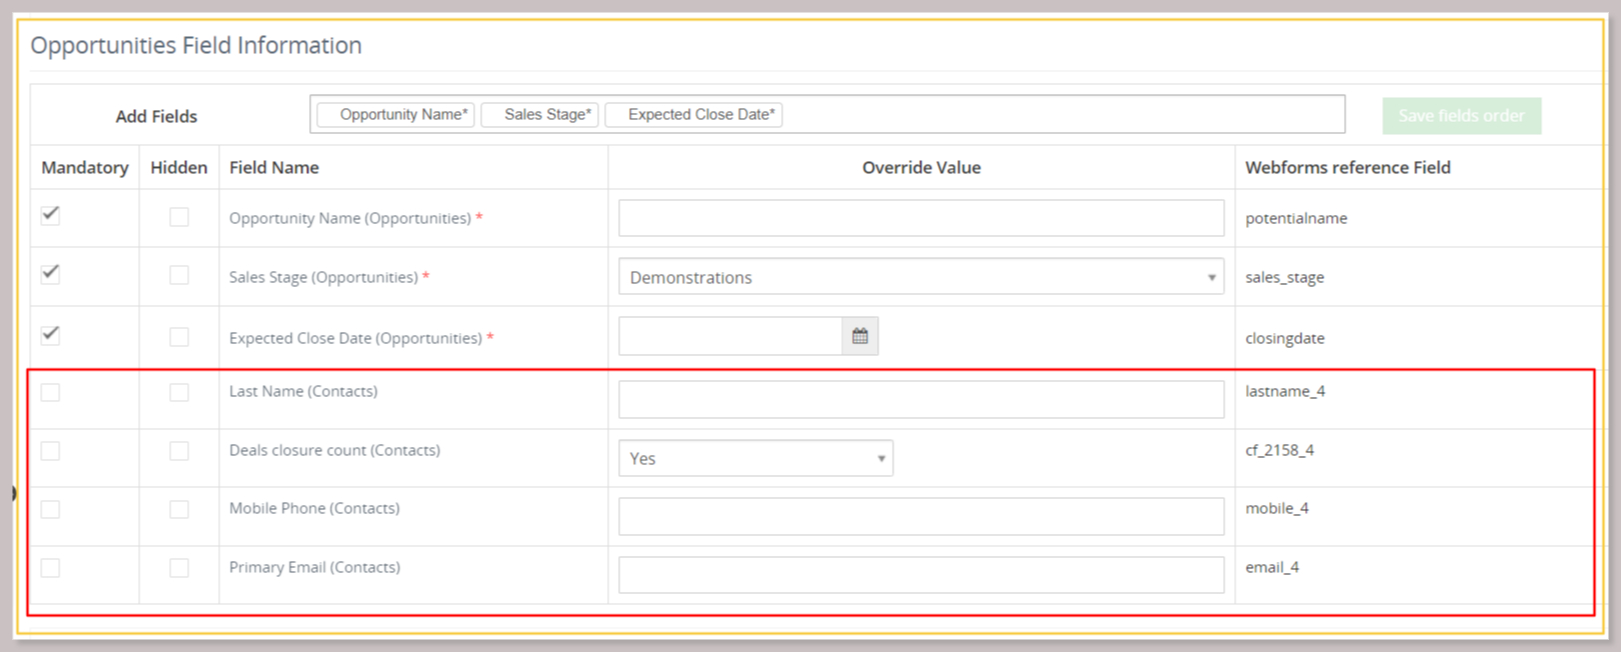
Under the " Add Field " select the fields for your webform.
Let us say we need to have First Name, Designation, primary phone, city fields to be shown in the webform. Also, we would like to set the Lead Source of all Opportunity generated from this webform to be a website.
Let us understand the option before we go-ahead
- Mandatory: Fields marked as mandatory will always have to be filled in the Form.
- Hidden: These fields will not be visible to the user or visitors submitting the Form.
-
Override Value: The values defined here will be overridden irrespective of the value submitted in Webform.

- Select the field First Name, Last Name, Mobile phone, Primary phone, Lead source under the " Add Field ".
- To set the Lead source as Website mark the Lead Source field as hidden, Mandatory, and set the Override Value as Website.
Note: Only one field can be selected in Lookup field for a module. Multiple fields cannot be selected.
-
In the Reference Field block all the Reference Fields of Leads Module will be listed below.
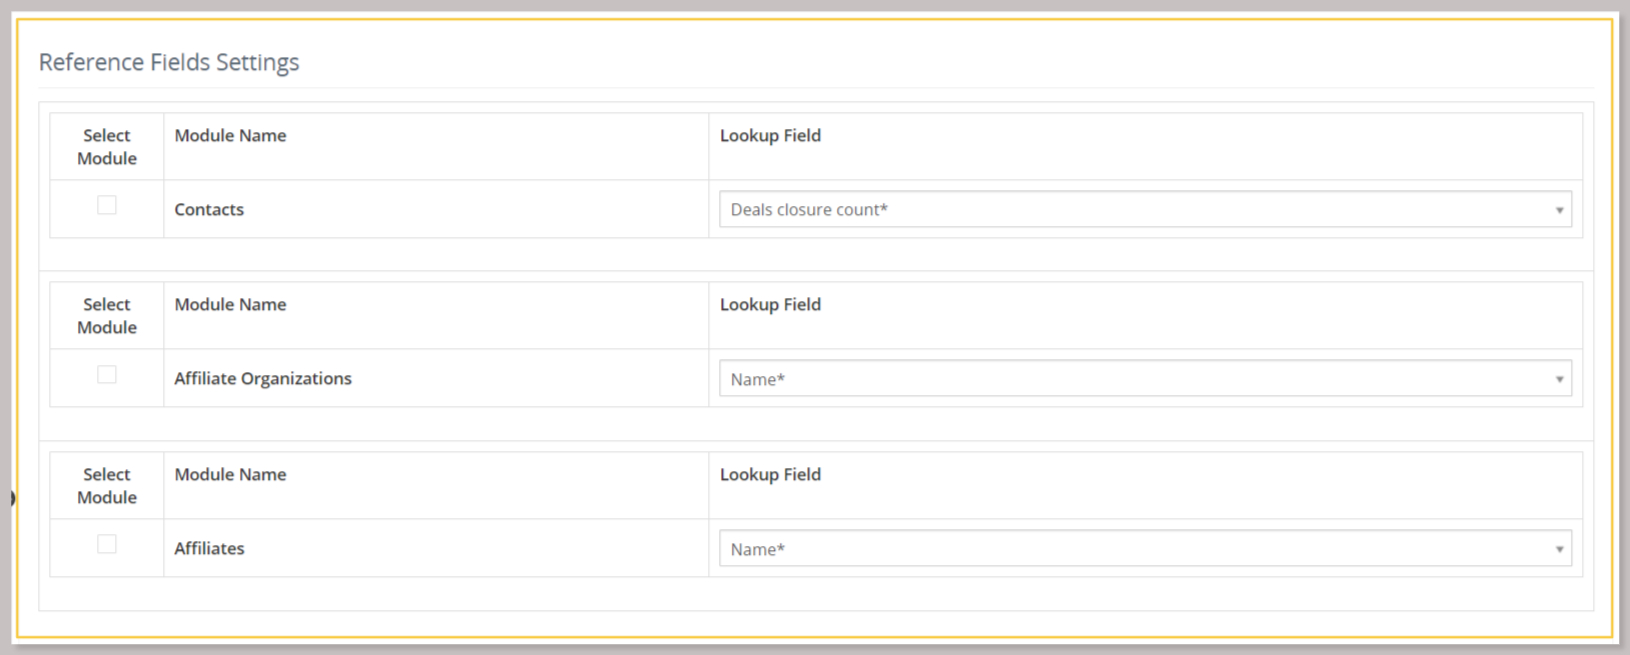
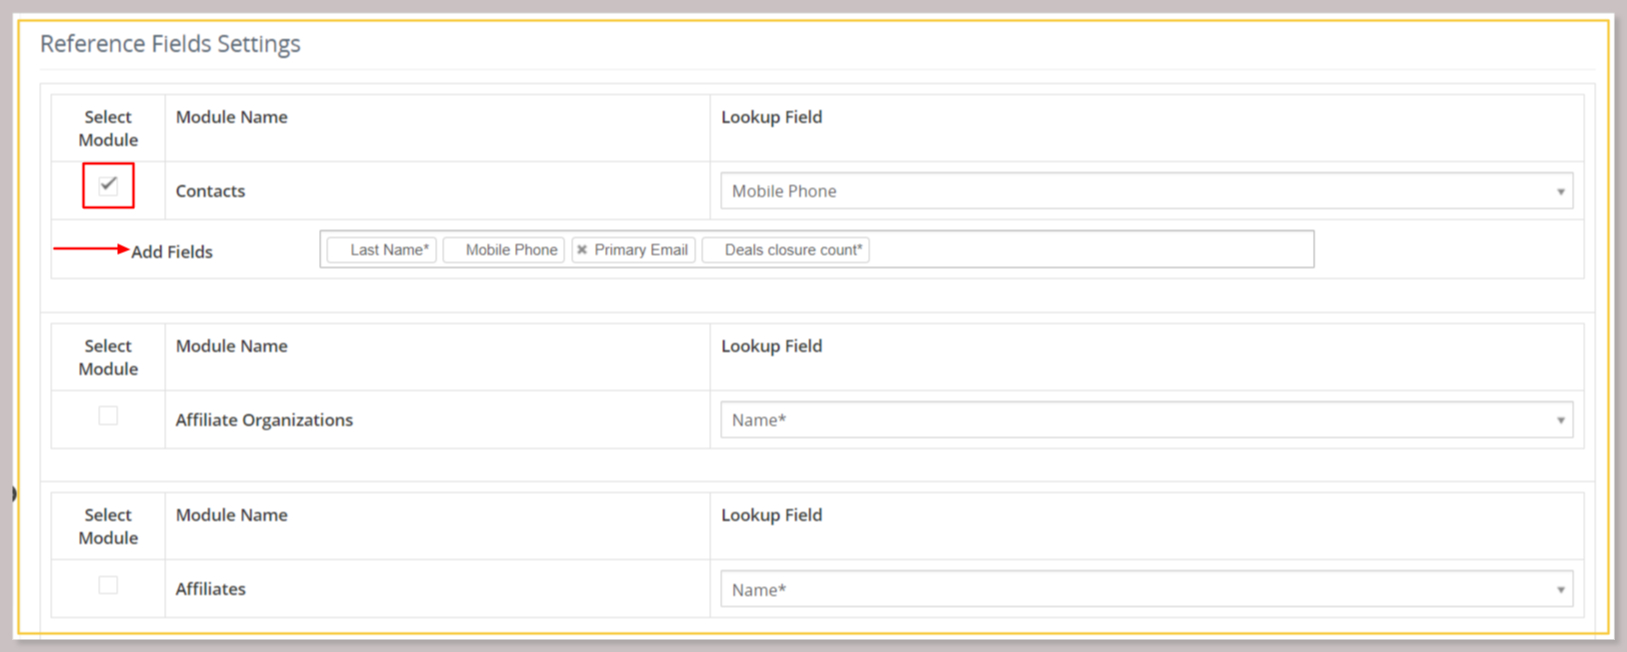
- To add the Reference Field click on the checkbox.
- In “All Fields” using the dropdown fields section you can add fields which you want to capture in the selected Reference field module like Mobile Number, Primary Email, whereas the mandatory fields of Contacts module will be displayed automatically.
- In the "Lookup Field" section indicates to find a unique Contact of that record in the CRM.
-
The fields which is selected in the reference field that fields are displayed in the "Field Information" block.
- Click on the Save button.
-
To generate the HTML click on the show form button.

- Copy the HTML code.
- Edit your HTML page where you want to put the HTML form and paste the HTML code at the required place.
Note: The form generates is raw HTML without any styling.