Create Event action which creates a new Event automatically to the related record whenever the mentioned Workflow condition is met.
Set up a Workflow action to Create an Event:
Scenario: Event creations, When a New Lead is Generated through Facebook and Website, Create an event and assign to Parent Record Owner to follow up to convert the lead to potential.
- Go to Main Menu > CRM Settings > Automation > Workflow.
- Click on "New workflow" on the top right corner of the page.

- Create a Workflow

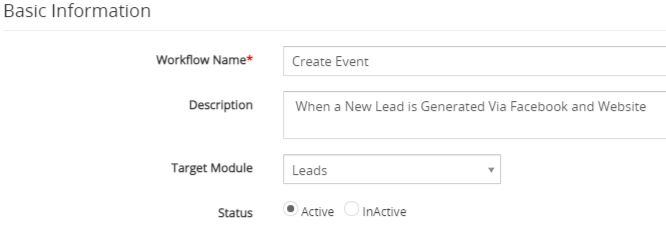
- The New Workflow edit form will appear, provide the required details.
- "Workflow Name", provide the name of the Workflow.
- "Description", provide the description of the Workflow.
- Select the preferred Module from the "Target Module" drop-down. For example, we would be using the Leads module.
- "Status", specify the status of the Workflow Active or Inactive. the Workflow will be executed when the status is set to active.
- Workflow Trigger
- Under the ‘Workflow Condition’ tab, Click on the Add Condition and provides the required conditions to execute the task.

- Under the ‘Workflow Actions’ Click on the Add Action drop-down tab and Click Create Event.

- Create Event window will pop up to provide required details and click on the Save button.

- Field Interpretation
- Action Title - Provide an Action Title of an Event, this is just for internal reference.
- Event Name - Provide the specific Title of the Event.
- Description - You can add the Description of the Event.
- Status - You can select the status of the Event from the drop-down.
- Type - You can select the Event activity Type from the drop-down
- Assigned To - You can select a preferred User to assign the Event or you can also select the Parent option which will take Assigned To from the parent record owner.
- Start Date - This is the Date and Time on which the Event must start. You must provide the no of days/hours/minutes anytime before or after the specified date field.
- End Date - This is the Date and Time on which the Event must End. You must provide the no of days/hours/minutes anytime before or after the specified date field.
Note
- In the Start and End Date segment in the Set Date field dropdown, if we set based on the DateTime field the system will take no of days/hours/minutes before or after the specified date-time field.
- In the Start and End Date segment in the Set Date field dropdown, if we set based on only the Date field the system will calculate and takes no of days/hours/minutes before or after from the Starting minute of the day (00:00) of the specified date field.
- In the Start and End Date segment in the Set Date field dropdown, if we set based on the DateTime field the system will take no of days/hours/minutes before or after the specified date-time field.
- Enable Repeat - Enable Repeat option is for creating recurring events.
- Click on the Save Button. This will closes the Create Event window.
- Click on the Save button to save the workflow. This will closes the window that opened in Step 3.


